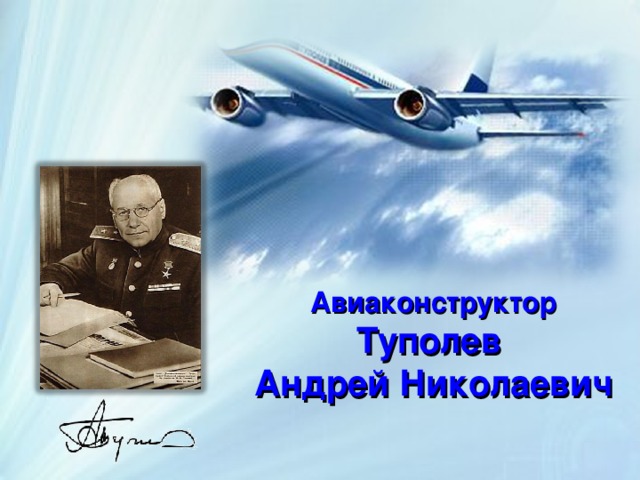
Авиаконструктор
Туполев
Андрей Николаевич
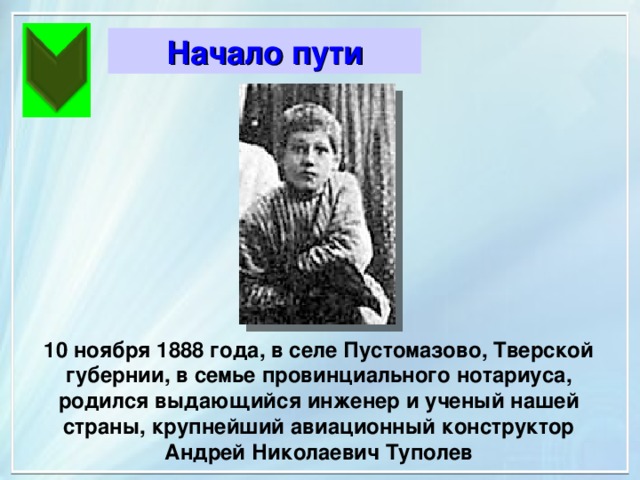
Начало пути
Годы учёбы, семья
Работа, достижения
Animated SmartArt chevron list
(Basic)
To reproduce the SmartArt on this slide, do the following:
- On the Home tab, in the Slides group, click Layout , and then click Blank .
- On the Insert tab, in the Illustrations group, click SmartArt . In the Choose a SmartArt Graphic dialog box, in the left pane, click List . In the List pane, click Vertical Chevron List (seventh row, second option from the left), and then click OK to insert the graphic into the slide.
- To create a fourth chevron, select the third chevron at the bottom of the graphic, and then under SmartArt Tools , on the Design tab, in the Create Graphic group, click the arrow next to Add Shape , and select Add Shape After .
- To add bullets for the fourth chevron, select the fourth chevron, and then under SmartArt Tools , on the Design tab, in the Create Graphic group, click Add Bullet .
- To enter text, select the SmartArt graphic, and then click one of the arrows on the left border. In the Type your text here dialog box, enter text for each level. (Note: In the example slide, the first-level text are the chevrons with “One,” “Two,” and “Three.” The second-level text are the “Supporting Text” lines.)
- On the slide, select the SmartArt graphic and drag the right center sizing handle to the right edge of the slide.
- With the SmartArt graphic still selected, on the Design Tab , in the Themes group, click Colors , and then under Built-In select Median . (Note: If this action is taken in a PowerPoint presentation containing more than one slide, the background style will be applied to all of the slides.)
- With the SmartArt graphic still selected, under SmartArt Tools , on the Design tab, in the SmartArt Styles group, click the More arrow, and then under 3-D select Inset (first row, second option from the left).
- Also under SmartArt Tools , on the Design tab, in the SmartArt Styles group, click Change Colors , and then under Colorful select Colorful Accent Colors (first option from the left).
To reproduce the chevron effects on this slide, do the following:
- Press and hold CTRL, and select all four chevrons in the SmartArt graphic. On the Home tab, in the Font group, in the Font list select Franklin Gothic Medium Cond , and then in the Font Size box select 28 pt .
- On the Home tab, in the bottom right corner of the Drawing group, click the Format Shape dialog box launcher. In the Format Shape dialog box, click Text Box in the left pane, and in the Text Box pane do the following:
- Under Text layout , in the Vertical alignment list select Bottom . Under Internal margin , do the following:
- Under Text layout , in the Vertical alignment list select Bottom .
- Under Internal margin , do the following:
- In the Left box enter 0” . In the Right box enter 0” . In the Bottom box enter 0” . In the Top box enter 0.6” .
- In the Left box enter 0” . In the Right box enter 0” . In the Bottom box enter 0” . In the Top box enter 0.6” .
- In the Left box enter 0” .
- In the Right box enter 0” .
- In the Bottom box enter 0” .
- In the Top box enter 0.6” .
To reproduce the rectangle effects on this slide, do the following:
- Press and hold CTRL, and the four rectangles (with bulleted text). On the Home tab, in the Font group, do the following:
- In the Font list, select Franklin Gothic Book . In the Font Size box, enter 21 pt. In the Font Color list, under Theme Colors select White, Background 1 (first row, first option from the left).
- In the Font list, select Franklin Gothic Book .
- In the Font Size box, enter 21 pt.
- In the Font Color list, under Theme Colors select White, Background 1 (first row, first option from the left).
- On the Home tab, in the bottom right corner of the Drawing group, click the Format Shape dialog box launcher. In the Format Shape dialog box, click Fill in the left pane, and in the Fill pane do the following:
- Click Gradient fill . In the Type list, select Linear . Click the button next to Direction , and then click Linear Down (first row, second option from the left).
- Click Gradient fill .
- In the Type list, select Linear .
- Click the button next to Direction , and then click Linear Down (first row, second option from the left).
- Under Gradient stops , click Add gradient stop or Remove gradient stop until two stops appear on the slider. Customize the gradient stops as follows:
- Select the first stop in the slider, and then do the following:
- Select the first stop in the slider, and then do the following:
- In the Position box, enter 0% . Click the button next to Color , and then under Theme Colors select Black, Text 1 (first row, second option from the left).
- In the Position box, enter 0% . Click the button next to Color , and then under Theme Colors select Black, Text 1 (first row, second option from the left).
- In the Position box, enter 0% .
- Click the button next to Color , and then under Theme Colors select Black, Text 1 (first row, second option from the left).
- In the Transparency box, enter 100 %.
- In the Transparency box, enter 100 %.
- In the Transparency box, enter 100 %.
- Select the last stop in the slider, and then do the following:
- Select the last stop in the slider, and then do the following:
- In the Position box, enter 100% . Click the button next to Color , and then under Theme Colors select Black, Text 1 (first row, second option from the left).
- In the Position box, enter 100% . Click the button next to Color , and then under Theme Colors select Black, Text 1 (first row, second option from the left).
- In the Position box, enter 100% .
- Click the button next to Color , and then under Theme Colors select Black, Text 1 (first row, second option from the left).
- In the Transparency box, enter 45 %.
- In the Transparency box, enter 45 %.
- In the Transparency box, enter 45 %.
- Also in the Format Shape dialog box, click Shadow in the left pane, and in the Shadow pane, in the Presets list select No Shadow .
- Also in the Format Shape dialog box, click 3-D Format in the left pane, and in the 3-D Format pane, under Bevel , in the Top list select No Bevel .
- Select the first from the top rectangle with bulleted text, and then do the following:
- On the Home tab, in the bottom right corner of the Drawing group, click the Format Shape dialog box launcher. In the Format Shape dialog box, click Line Color in the left pane, and in the Line Color pane do the following:
- On the Home tab, in the bottom right corner of the Drawing group, click the Format Shape dialog box launcher. In the Format Shape dialog box, click Line Color in the left pane, and in the Line Color pane do the following:
- Click Gradient fill . In the Type list, select Linear . Click the button next to Direction , and then click Linear Down (first row, second option from the left).
- Click Gradient fill . In the Type list, select Linear . Click the button next to Direction , and then click Linear Down (first row, second option from the left).
- Click Gradient fill .
- In the Type list, select Linear .
- Click the button next to Direction , and then click Linear Down (first row, second option from the left).
- Under Gradient stops , click Add or Remove until two stops appear on the slider. Customize the gradient stops as follows:
- Under Gradient stops , click Add or Remove until two stops appear on the slider. Customize the gradient stops as follows:
- Select Stop 1 on the slider, and then do the following:
- Select Stop 1 on the slider, and then do the following:
- Select Stop 1 on the slider, and then do the following:
- In the Position box, enter 0% . Click the button next to Color , and then under Theme Colors select Orange, Accent 2 (first row, sixth option from the left).
- In the Position box, enter 0% . Click the button next to Color , and then under Theme Colors select Orange, Accent 2 (first row, sixth option from the left).
- In the Position box, enter 0% . Click the button next to Color , and then under Theme Colors select Orange, Accent 2 (first row, sixth option from the left).
- In the Position box, enter 0% .
- Click the button next to Color , and then under Theme Colors select Orange, Accent 2 (first row, sixth option from the left).
- In the Transparency box, enter 100 %.
- In the Transparency box, enter 100 %.
- In the Transparency box, enter 100 %.
- In the Transparency box, enter 100 %.
- Select Stop 2 on the slider, and then do the following:
- Select Stop 2 on the slider, and then do the following:
- Select Stop 2 on the slider, and then do the following:
- In the Position box, enter 100% . Click the button next to Color , and then under Theme Colors select Orange, Accent 2 (first row, sixth option from the left).
- In the Position box, enter 100% . Click the button next to Color , and then under Theme Colors select Orange, Accent 2 (first row, sixth option from the left).
- In the Position box, enter 100% . Click the button next to Color , and then under Theme Colors select Orange, Accent 2 (first row, sixth option from the left).
- In the Position box, enter 100% .
- Click the button next to Color , and then under Theme Colors select Orange, Accent 2 (first row, sixth option from the left).
- In the Transparency box, enter 0 %.
- In the Transparency box, enter 0 %.
- In the Transparency box, enter 0 %.
- In the Transparency box, enter 0 %.
- Select the second from the top rectangle with bulleted text, and then do the following:
- On the Home tab, in the bottom right corner of the Drawing group, click the Format Shape dialog box launcher. In the Format Shape dialog box, click Line Color in the left pane, and in the Line Color pane do the following:
- On the Home tab, in the bottom right corner of the Drawing group, click the Format Shape dialog box launcher. In the Format Shape dialog box, click Line Color in the left pane, and in the Line Color pane do the following:
- Click Gradient fill . In the Type list, select Linear . Click the button next to Direction , and then click Linear Down (first row, second option from the left).
- Click Gradient fill . In the Type list, select Linear . Click the button next to Direction , and then click Linear Down (first row, second option from the left).
- Click Gradient fill .
- In the Type list, select Linear .
- Click the button next to Direction , and then click Linear Down (first row, second option from the left).
- Under Gradient stops , click Add gradient stop or Remove gradient stop until two stops appear on the slider. Customize the gradient stops as follows:
- Under Gradient stops , click Add gradient stop or Remove gradient stop until two stops appear on the slider. Customize the gradient stops as follows:
- Select the first stop on the slider, and then do the following:
- Select the first stop on the slider, and then do the following:
- Select the first stop on the slider, and then do the following:
- In the Position box, enter 0% . Click the button next to Color , and then under Theme Colors select Olive Green, Accent 3 (first row, sixth option from the left).
- In the Position box, enter 0% . Click the button next to Color , and then under Theme Colors select Olive Green, Accent 3 (first row, sixth option from the left).
- In the Position box, enter 0% . Click the button next to Color , and then under Theme Colors select Olive Green, Accent 3 (first row, sixth option from the left).
- In the Position box, enter 0% .
- Click the button next to Color , and then under Theme Colors select Olive Green, Accent 3 (first row, sixth option from the left).
- In the Transparency box, enter 100 %.
- In the Transparency box, enter 100 %.
- In the Transparency box, enter 100 %.
- In the Transparency box, enter 100 %.
- Select the last stop on the slider, and then do the following:
- Select the last stop on the slider, and then do the following:
- Select the last stop on the slider, and then do the following:
- In the Position box, enter 100% . Click the button next to Color , and then under Theme Colors select Olive Green, Accent 3 (first row, sixth option from the left).
- In the Position box, enter 100% . Click the button next to Color , and then under Theme Colors select Olive Green, Accent 3 (first row, sixth option from the left).
- In the Position box, enter 100% . Click the button next to Color , and then under Theme Colors select Olive Green, Accent 3 (first row, sixth option from the left).
- In the Position box, enter 100% .
- Click the button next to Color , and then under Theme Colors select Olive Green, Accent 3 (first row, sixth option from the left).
- In the Transparency box, enter 0 %.
- In the Transparency box, enter 0 %.
- In the Transparency box, enter 0 %.
- In the Transparency box, enter 0 %.
- Select the third from the top rectangle with bulleted text, and then do the following:
- On the Home tab, in the bottom right corner of the Drawing group, click the Format Shape dialog box launcher. In the Format Shape dialog box, click Line Color in the left pane, and in the Line Color pane do the following:
- On the Home tab, in the bottom right corner of the Drawing group, click the Format Shape dialog box launcher. In the Format Shape dialog box, click Line Color in the left pane, and in the Line Color pane do the following:
- Click Gradient fill . In the Type list, select Linear . Click the button next to Direction , and then click Linear Down (first row, second option from the left).
- Click Gradient fill . In the Type list, select Linear . Click the button next to Direction , and then click Linear Down (first row, second option from the left).
- Click Gradient fill .
- In the Type list, select Linear .
- Click the button next to Direction , and then click Linear Down (first row, second option from the left).
- Under Gradient stops , click Add gradient stop or Remove gradient stop until two stops appear on the slider. Customize the gradient stops as follows:
- Under Gradient stops , click Add gradient stop or Remove gradient stop until two stops appear on the slider. Customize the gradient stops as follows:
- Select the first stop on the slider, and then do the following:
- Select the first stop on the slider, and then do the following:
- Select the first stop on the slider, and then do the following:
- In the Position box, enter 0% . Click the button next to Color , and then under Theme Colors select Gold, Accent 4 (first row, seventh option from the left).
- In the Position box, enter 0% . Click the button next to Color , and then under Theme Colors select Gold, Accent 4 (first row, seventh option from the left).
- In the Position box, enter 0% . Click the button next to Color , and then under Theme Colors select Gold, Accent 4 (first row, seventh option from the left).
- In the Position box, enter 0% .
- Click the button next to Color , and then under Theme Colors select Gold, Accent 4 (first row, seventh option from the left).
- In the Transparency box, enter 100 %.
- In the Transparency box, enter 100 %.
- In the Transparency box, enter 100 %.
- In the Transparency box, enter 100 %.
- Select the last stop on the slider, and then do the following:
- Select the last stop on the slider, and then do the following:
- Select the last stop on the slider, and then do the following:
- In the Position box, enter 100% . Click the button next to Color , and then under Theme Colors select Gold, Accent 4 (first row, seventh option from the left).
- In the Position box, enter 100% . Click the button next to Color , and then under Theme Colors select Gold, Accent 4 (first row, seventh option from the left).
- In the Position box, enter 100% . Click the button next to Color , and then under Theme Colors select Gold, Accent 4 (first row, seventh option from the left).
- In the Position box, enter 100% .
- Click the button next to Color , and then under Theme Colors select Gold, Accent 4 (first row, seventh option from the left).
- In the Transparency box, enter 0 %.
- In the Transparency box, enter 0 %.
- In the Transparency box, enter 0 %.
- In the Transparency box, enter 0 %.
- Select the fourth from the top rectangle with bulleted text, and then do the following:
- On the Home tab, in the bottom right corner of the Drawing group, click the Format Shape dialog box launcher. In the Format Shape dialog box, click Line Color in the left pane, and in the Line Color pane do the following:
- On the Home tab, in the bottom right corner of the Drawing group, click the Format Shape dialog box launcher. In the Format Shape dialog box, click Line Color in the left pane, and in the Line Color pane do the following:
- Click Gradient fill . In the Type list, select Linear . Click the button next to Direction , and then click Linear Down (first row, second option from the left).
- Click Gradient fill . In the Type list, select Linear . Click the button next to Direction , and then click Linear Down (first row, second option from the left).
- Click Gradient fill .
- In the Type list, select Linear .
- Click the button next to Direction , and then click Linear Down (first row, second option from the left).
- Under Gradient stops , click Add gradient stop or Remove gradient stop until two stops appear on the slider. Customize the gradient stops as follows:
- Under Gradient stops , click Add gradient stop or Remove gradient stop until two stops appear on the slider. Customize the gradient stops as follows:
- Select the first stop on the slider, and then do the following:
- Select the first stop on the slider, and then do the following:
- Select the first stop on the slider, and then do the following:
- In the Position box, enter 0% . Click the button next to Color , and then under Theme Colors select Green, Accent 5 (first row, 8th option from the left).
- In the Position box, enter 0% . Click the button next to Color , and then under Theme Colors select Green, Accent 5 (first row, 8th option from the left).
- In the Position box, enter 0% . Click the button next to Color , and then under Theme Colors select Green, Accent 5 (first row, 8th option from the left).
- In the Position box, enter 0% .
- Click the button next to Color , and then under Theme Colors select Green, Accent 5 (first row, 8th option from the left).
- In the Transparency box, enter 100 %.
- In the Transparency box, enter 100 %.
- In the Transparency box, enter 100 %.
- In the Transparency box, enter 100 %.
- Select the last stop on the slider, and then do the following:
- Select the last stop on the slider, and then do the following:
- Select the last stop on the slider, and then do the following:
- In the Position box, enter 100% . Click the button next to Color , and then under Theme Colors select Green, Accent 5 (first row, 8th option from the left).
- In the Position box, enter 100% . Click the button next to Color , and then under Theme Colors select Green, Accent 5 (first row, 8th option from the left).
- In the Position box, enter 100% . Click the button next to Color , and then under Theme Colors select Green, Accent 5 (first row, 8th option from the left).
- In the Position box, enter 100% .
- Click the button next to Color , and then under Theme Colors select Green, Accent 5 (first row, 8th option from the left).
- In the Transparency box, enter 0 %.
- In the Transparency box, enter 0 %.
- In the Transparency box, enter 0 %.
- In the Transparency box, enter 0 %.
To reproduce the animation effects on this slide, do the following:
- On the Animations tab, in the Advanced Animation group, click Animation Pane .
- Select the SmartArt graphic, and then on the Animations tab, in the Animation group, click the More arrow on the Effects Gallery and under Entrance , click Grow & Turn .
- In the Animation group, click Effect Options , and under Sequence , click One by one .
- In the Timing group, in the Duration list, enter 01.00 .
- In the Animation Pane , click the double arrow to expand the contents of the list. Press and hold CTRL, and select the second, fourth, sixth, and eighth effects (bullets’ grow & turn entrance effects), and then do the following:
- In the Animation group, click the More arrow on the Effects Gallery and then click More Entrance Effects . Under Basic , click Peek In , and then click OK . With the four peek in entrance effects still selected, in the Timing group, do the following:
- In the Animation group, click the More arrow on the Effects Gallery and then click More Entrance Effects . Under Basic , click Peek In , and then click OK .
- With the four peek in entrance effects still selected, in the Timing group, do the following:
- In the Start list, select With Previous . In the Duration list, select 01.00 .
- In the Start list, select With Previous . In the Duration list, select 01.00 .
- In the Start list, select With Previous .
- In the Duration list, select 01.00 .
- Select the first grow & turn entrance effect in the list, and in the Timing group, in the Start list, click With Previous .
To reproduce the background effects on this slide, do the following:
- Right-click the slide background area, and then click Format Background . In the Format Background dialog box, click Fill in the left pane, select Gradient fill in the Fill pane, and then do the following:
- In the Type list, select Radial . Click the button next to Direction , and then click From Center (third option from the left).
- In the Type list, select Radial .
- Click the button next to Direction , and then click From Center (third option from the left).
- Under Gradient stops , click Add gradient stop or Remove gradient stop until two stops appear on the slider. Customize the gradient stops as follows:
- Select the first stop on the slider, and then do the following:
- Select the first stop on the slider, and then do the following:
- In the Position box, enter 20% . Click the button next to Color , and then under Theme Colors select White, Background 1, Darker 25% (fourth row, first option from the left).
- In the Position box, enter 20% . Click the button next to Color , and then under Theme Colors select White, Background 1, Darker 25% (fourth row, first option from the left).
- In the Position box, enter 20% .
- Click the button next to Color , and then under Theme Colors select White, Background 1, Darker 25% (fourth row, first option from the left).
- Select the second stop on the slider, and then do the following:
- Select the second stop on the slider, and then do the following:
- In the Position box, enter 100% . Click the button next to Color , and then under Theme Colors select Black, Text 1 (first row, second option from the left).
- In the Position box, enter 100% . Click the button next to Color , and then under Theme Colors select Black, Text 1 (first row, second option from the left).
- In the Position box, enter 100% .
- Click the button next to Color , and then under Theme Colors select Black, Text 1 (first row, second option from the left).
Память
Протестируемся?
Начало пути
Начало пути
10 ноября 1888 года, в селе Пустомазово, Тверской губернии, в семье провинциального нотариуса, родился выдающийся инженер и ученый нашей страны, крупнейший авиационный конструктор Андрей Николаевич Туполев
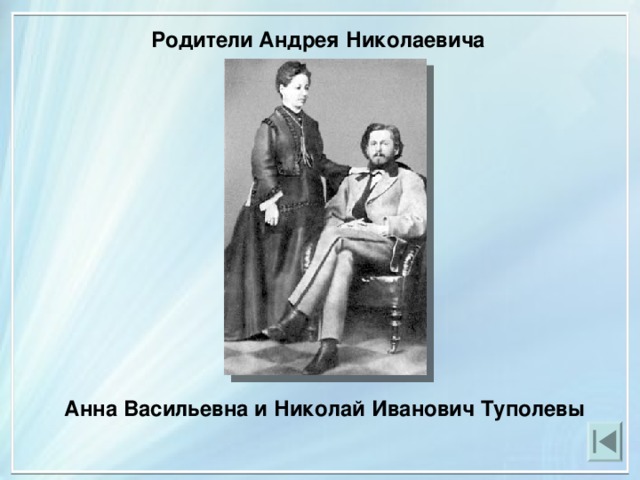
Родители Андрея Николаевича
Анна Васильевна и Николай Иванович Туполевы
Годы учёбы, семья
Годы учёбы, семья
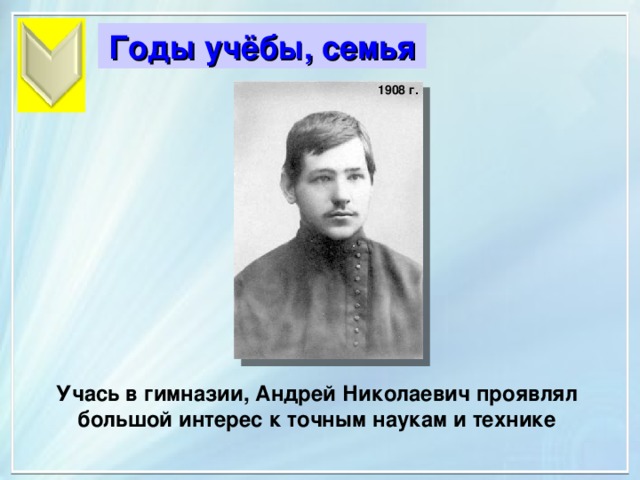
1908 г.
Учась в гимназии, Андрей Николаевич проявлял большой интерес к точным наукам и технике
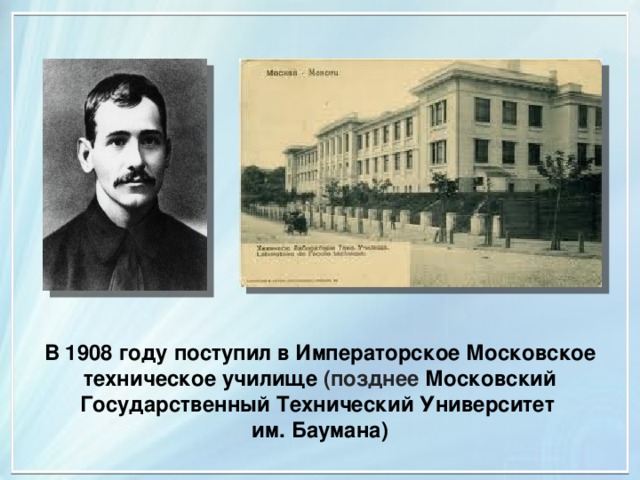
В 1908 году поступил в Императорское Московское техническое училище (позднее Московский Государственный Технический Университет
им. Баумана)
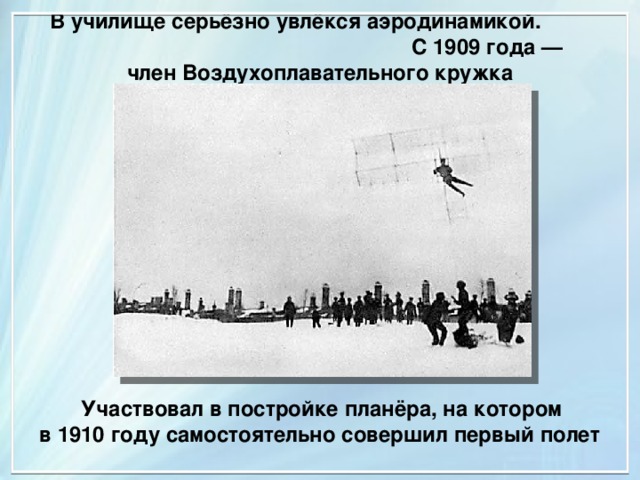
В училище серьёзно увлёкся аэродинамикой. С 1909 года — член Воздухоплавательного кружка
Участвовал в постройке планёра, на котором
в 1910 году самостоятельно совершил первый полет
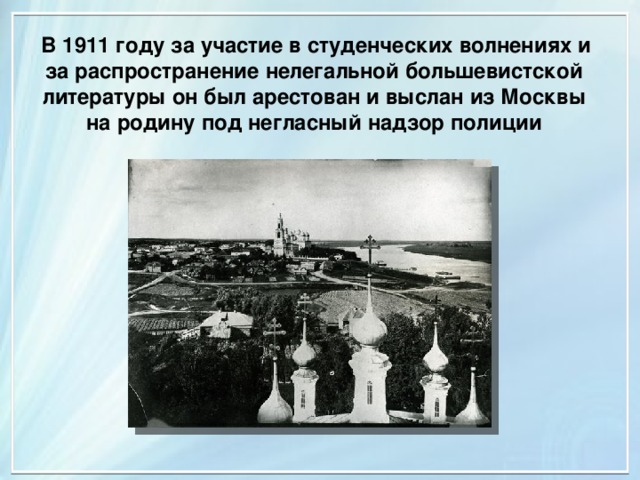
В 1911 году за участие в студенческих волнениях и за распространение нелегальной большевистской литературы он был арестован и выслан из Москвы на родину под негласный надзор полиции
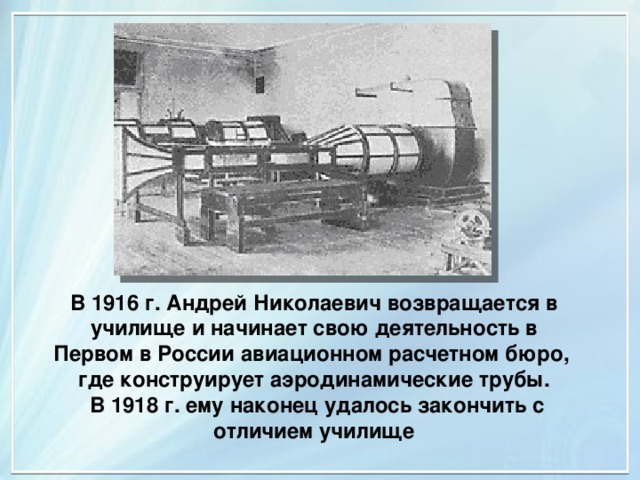
В 1916 г. Андрей Николаевич возвращается в училище и начинает свою деятельность в Первом в России авиационном расчетном бюро,
где конструирует аэродинамические трубы.
В 1918 г. ему наконец удалось закончить с отличием училище
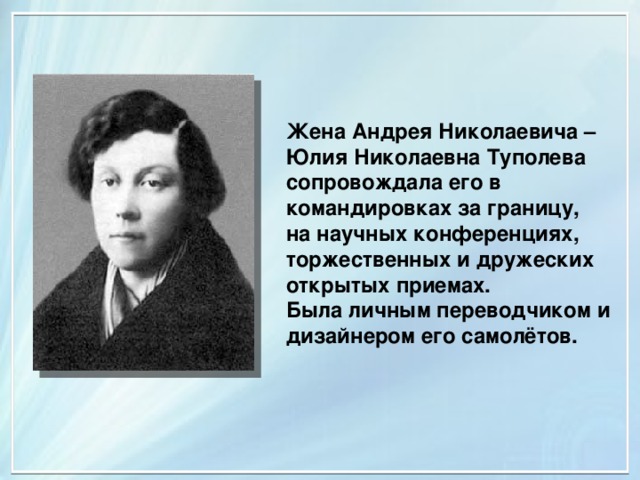
Жена Андрея Николаевича – Юлия Николаевна Туполева сопровождала его в командировках за границу,
на научных конференциях, торжественных и дружеских открытых приемах.
Была личным переводчиком и дизайнером его самолётов.

1927 г.
Андрей Николаевич с дочерью Юлией и сыном Алексеем
Работа, достижения
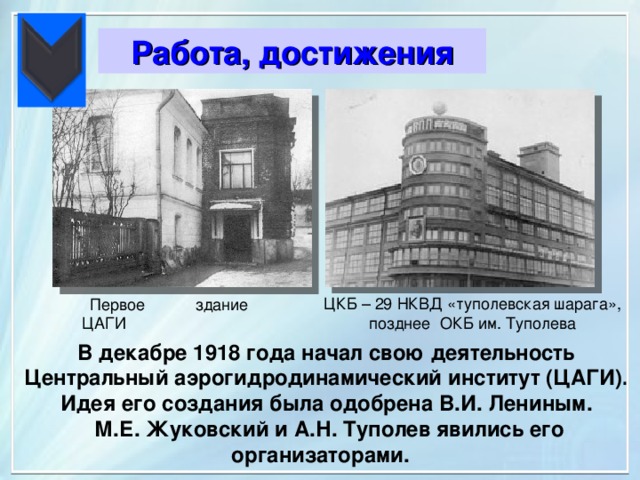
ЦКБ – 29 НКВД «туполевская шарага», позднее ОКБ им. Туполева
Первое здание ЦАГИ
В декабре 1918 года начал свою деятельность Центральный аэрогидродинамический институт (ЦАГИ).
Идея его создания была одобрена В.И. Лениным.
М.Е. Жуковский и А.Н. Туполев явились его организаторами.
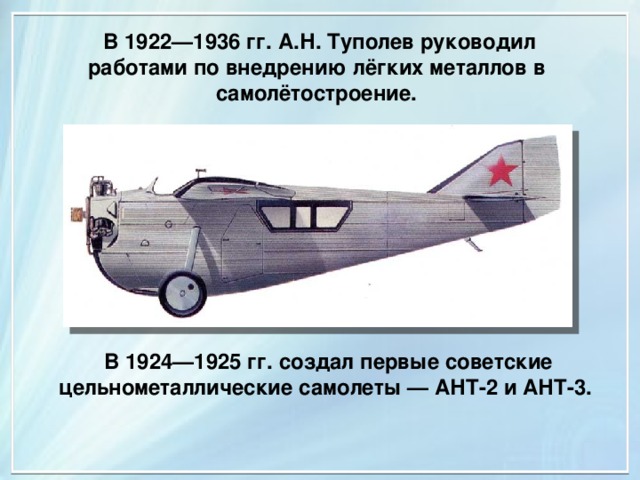
В 1922—1936 гг. А.Н. Туполев руководил работами по внедрению лёгких металлов в самолётостроение.
В 1924—1925 гг. создал первые советские цельнометаллические самолеты — АНТ-2 и АНТ-3.
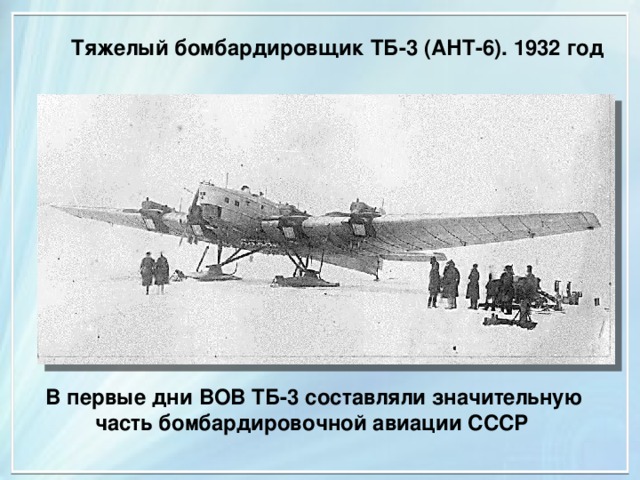
Тяжелый бомбардировщик ТБ-3 (АНТ-6). 1932 год
В первые дни ВОВ ТБ-3 составляли значительную часть бомбардировочной авиации СССР
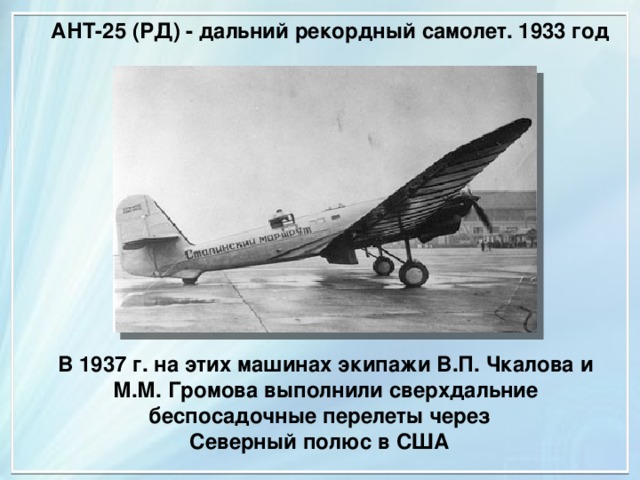
АНТ-25 (РД) - дальний рекордный самолет. 1933 год
В 1937 г. на этих машинах экипажи В.П. Чкалова и
М.М. Громова выполнили сверхдальние беспосадочные перелеты через
Северный полюс в США
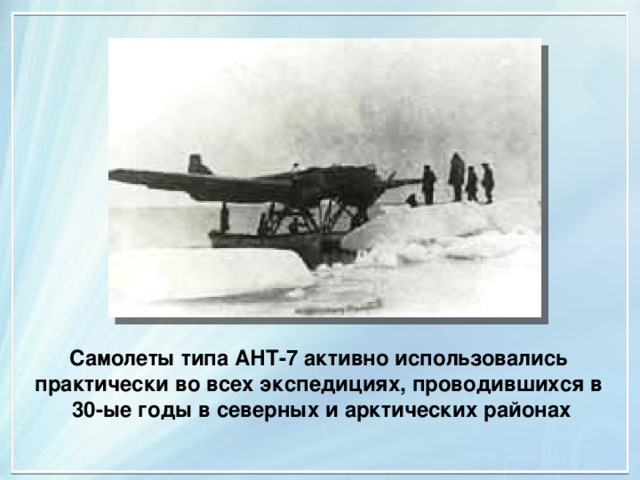
Самолеты типа АНТ-7 активно использовались практически во всех экспедициях, проводившихся в
30-ые годы в северных и арктических районах
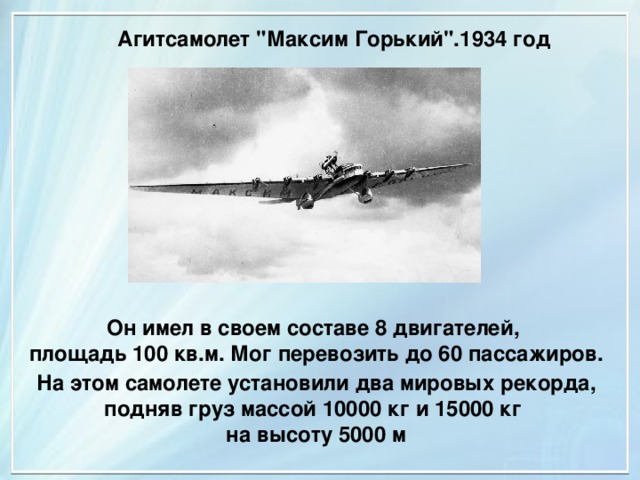
Агитсамолет "Максим Горький".1934 год
Он имел в своем составе 8 двигателей,
площадь 100 кв.м. Мог перевозить до 60 пассажиров.
На этом самолете установили два мировых рекорда, подняв груз массой 10000 кг и 15000 кг
на высоту 5000 м
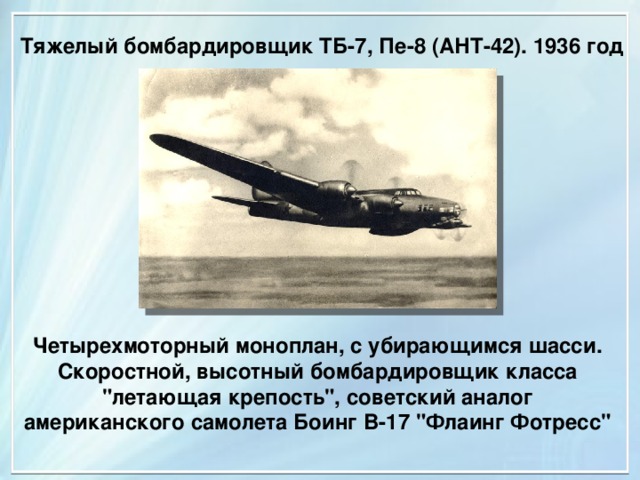
Тяжелый бомбардировщик ТБ-7, Пе-8 (АНТ-42). 1936 год
Четырехмоторный моноплан, с убирающимся шасси. Скоростной, высотный бомбардировщик класса "летающая крепость", советский аналог американского самолета Боинг В-17 "Флаинг Фотресс"
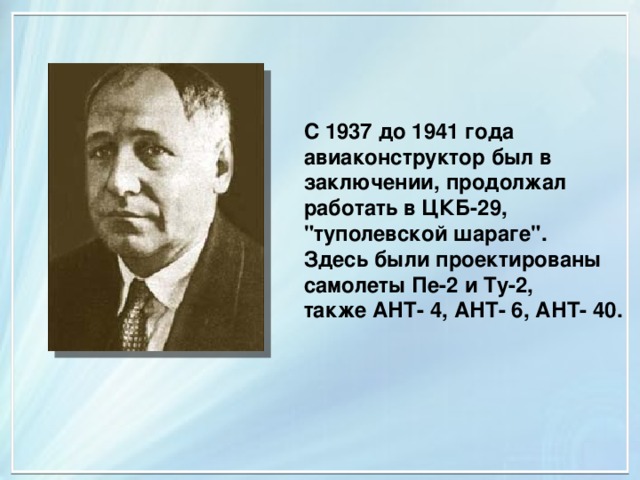
С 1937 до 1941 года авиаконструктор был в заключении, продолжал работать в ЦКБ-29, "туполевской шараге".
Здесь были проектированы
самолеты Пе-2 и Ту-2,
также АНТ- 4, АНТ- 6, АНТ- 40.
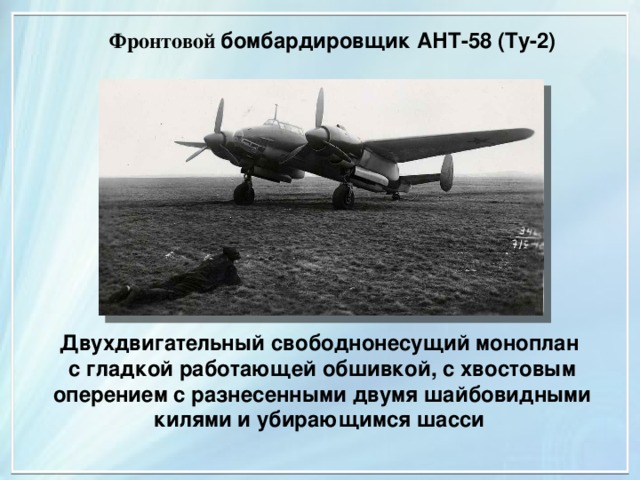
Фронтовой бомбардировщик АНТ-58 (Ту-2)
Двухдвигательный свободнонесущий моноплан
с гладкой работающей обшивкой, с хвостовым оперением с разнесенными двумя шайбовидными килями и убирающимся шасси
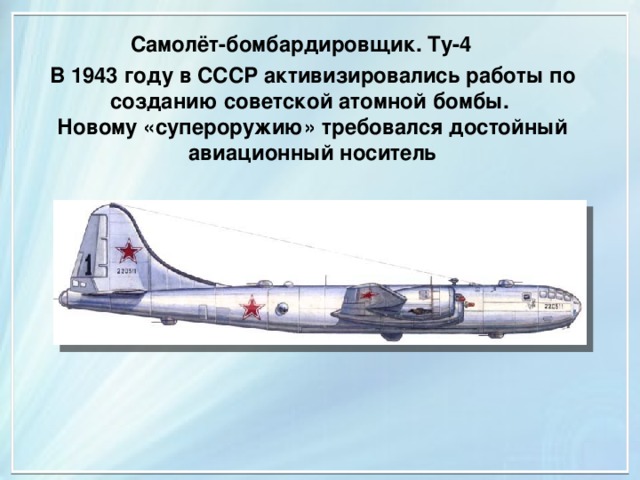
Самолёт-бомбардировщик. Ту-4
В 1943 году в СССР активизировались работы по созданию советской атомной бомбы.
Новому «супероружию» требовался достойный авиационный носитель
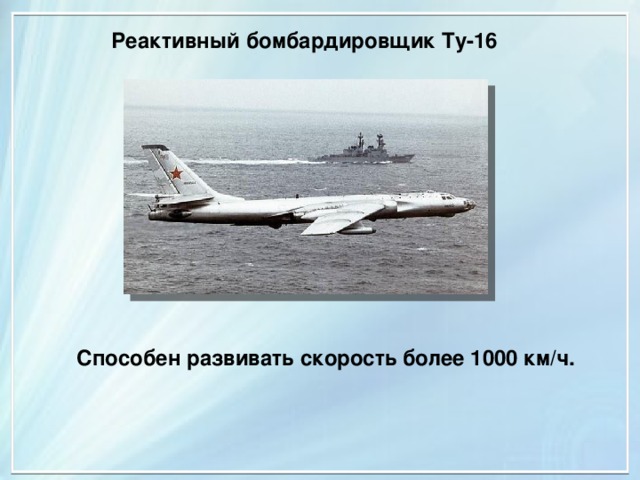
Реактивный бомбардировщик Ту-16
Способен развивать скорость более 1000 км/ч.

Самолет Ту-104
Первенец отечественного реактивного пассажирского самолетостроения, сделанный на базе ТУ-16
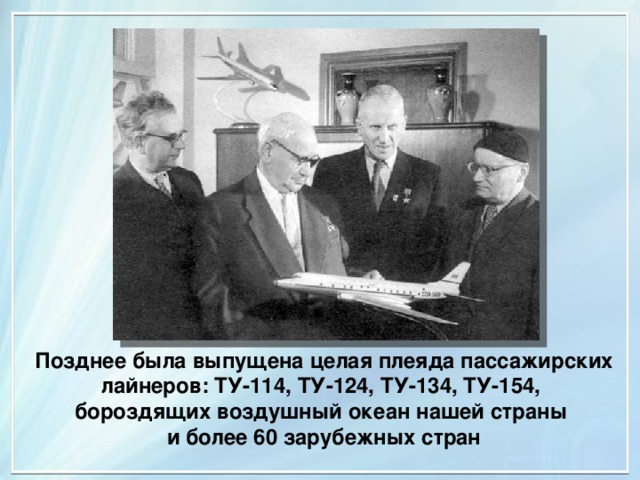
Позднее была выпущена целая плеяда пассажирских лайнеров: ТУ-114, ТУ-124, ТУ-134, ТУ-154,
бороздящих воздушный океан нашей страны
и более 60 зарубежных стран

Первый в истории авиации межконтинентальный турбовинтовой самолет Ту-114
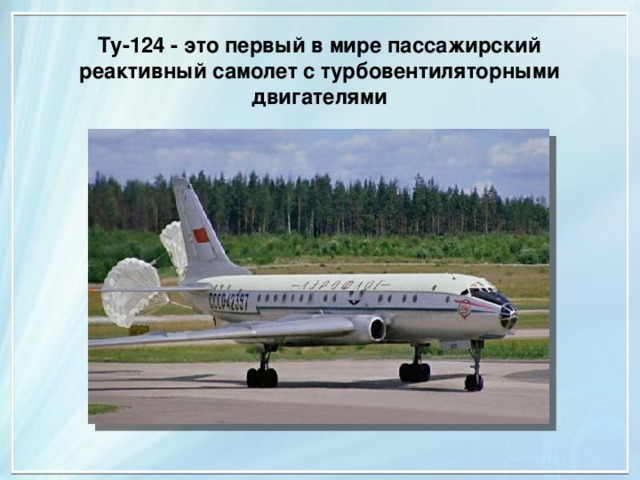
Ту-124 - это первый в мире пассажирский реактивный самолет с турбовентиляторными двигателями
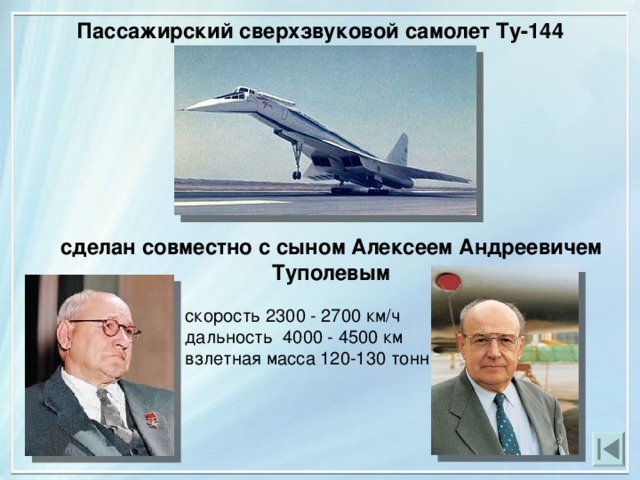
Пассажирский сверхзвуковой самолет Ту-144
сделан совместно с сыном Алексеем Андреевичем Туполевым
скорость 2300 - 2700 км/ч дальность 4000 - 4500 км взлетная масса 120-130 тонн
Память
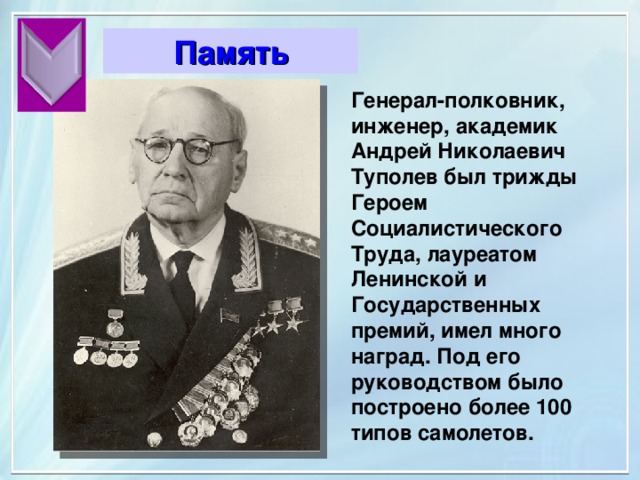
Генерал-полковник, инженер, академик Андрей Николаевич Туполев был трижды Героем Социалистического Труда, лауреатом Ленинской и Государственных премий, имел много наград. Под его руководством было построено более 100 типов самолетов.
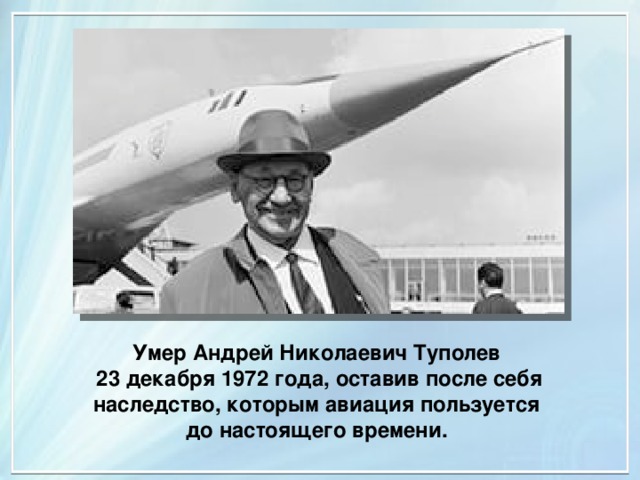
Умер Андрей Николаевич Туполев
23 декабря 1972 года, оставив после себя наследство, которым авиация пользуется до настоящего времени.

Протестируемся?
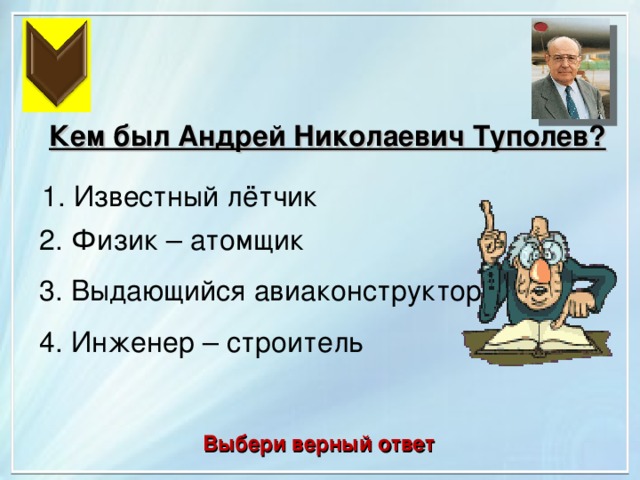
Кем был Андрей Николаевич Туполев?
1. Известный лётчик
2. Физик – атомщик
3. Выдающийся авиаконструктор
4. Инженер – строитель
Выбери верный ответ
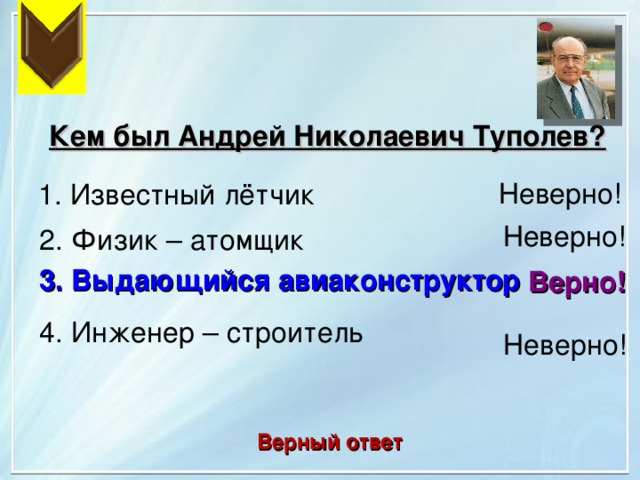
Кем был Андрей Николаевич Туполев?
Неверно!
1. Известный лётчик
Неверно!
2. Физик – атомщик
3. Выдающийся авиаконструктор
Верно!
4. Инженер – строитель
Неверно!
Верный ответ
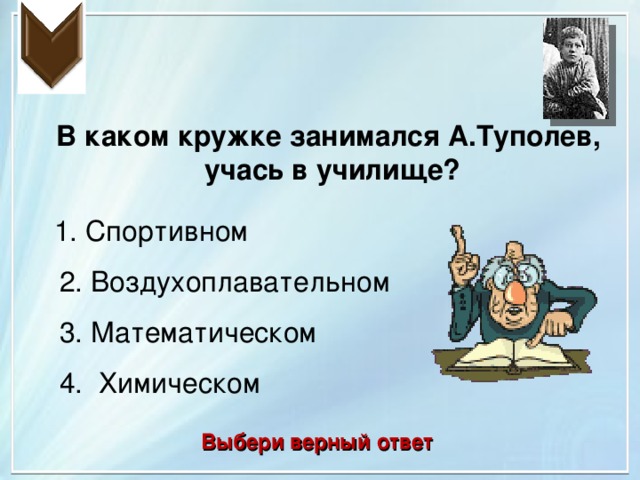
В каком кружке занимался А.Туполев,
учась в училище?
1. Спортивном
2. Воздухоплавательном
3. Математическом
4. Химическом
Выбери верный ответ
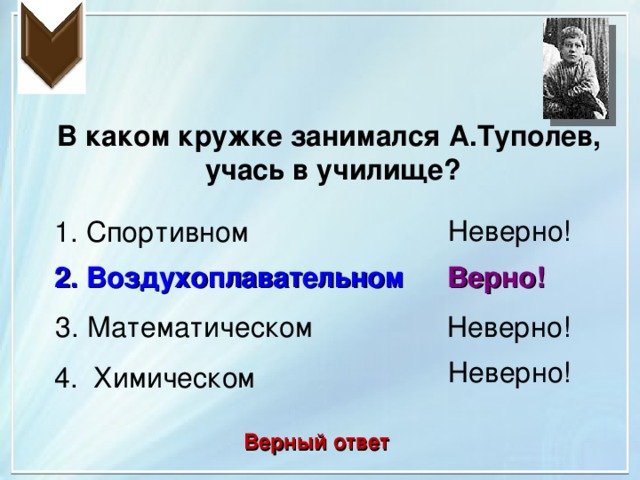
В каком кружке занимался А.Туполев,
учась в училище?
Неверно!
1. Спортивном
2. Воздухоплавательном
Верно!
3. Математическом
Неверно!
Неверно!
4. Химическом
Верный ответ

На фотографии вы видите:
1. Жену авиаконструктора
2. Сестру
3. Мать
4. Дочь
Выбери верный ответ
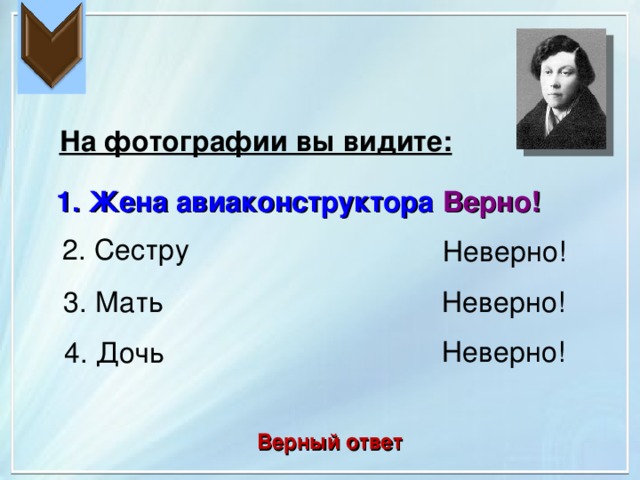
На фотографии вы видите:
1. Жена авиаконструктора
Верно!
2. Сестру
Неверно!
3. Мать
Неверно!
Неверно!
4. Дочь
Верный ответ

В чём помогала жена
Андрею Николаевичу?
1. Токарных работах
2. Дизайне его самолётов
3. Посадке овощей
4 . В выборе продуктов
Выбери верный ответ

В чём помогала жена
Андрею Николаевичу?
Неверно!
1. Токарных работах
Верно!
2. Дизайне его самолётов
3. Посадке овощей
Неверно!
Неверно!
4 . В выборе продуктов
Верный ответ
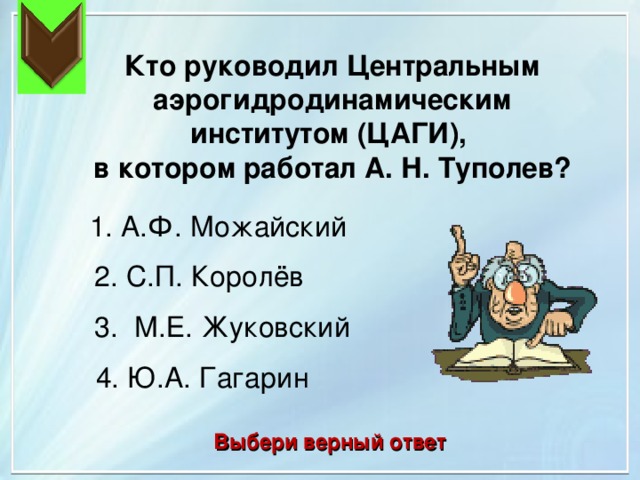
Кто руководил Центральным аэрогидродинамическим институтом (ЦАГИ),
в котором работал А. Н. Туполев?
1. А.Ф. Можайский
2. С.П. Королёв
3. М.Е. Жуковский
4. Ю.А. Гагарин
Выбери верный ответ
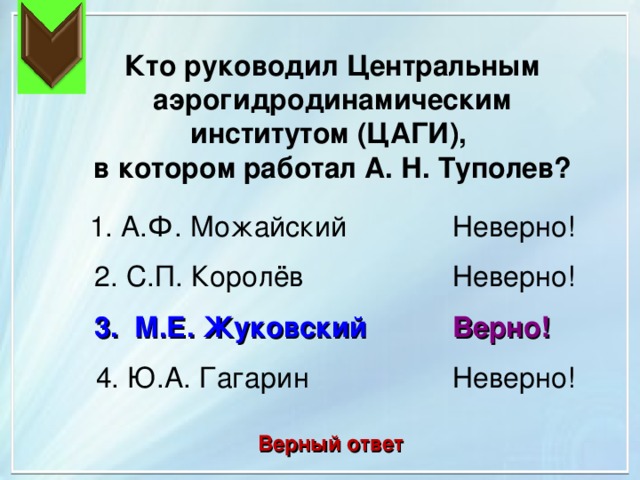
Кто руководил Центральным аэрогидродинамическим институтом (ЦАГИ),
в котором работал А. Н. Туполев?
Неверно!
1. А.Ф. Можайский
2. С.П. Королёв
Неверно!
Верно!
3. М.Е. Жуковский
4. Ю.А. Гагарин
Неверно!
Верный ответ
В каком году А. Н. Туполев был арестован и работал в ЦКБ-29, "туполевской шараге?
1. В 1924 г.
2. В 1937 г.
3. В 1954 г.
4. В 1943 г.
Выбери верный ответ
В каком году А. Н. Туполев был арестован и работал в ЦКБ-29, "туполевской шараге?
Неверно!
1. В 1924 г.
Верно!
2. В 1937 г.
3. В 1954 г.
Неверно!
4. В 1943 г.
Неверно!
Верный ответ
Ценным предложением А.Н. Туполева было внедрение в самолётостроение:
1. Дерева
2. Каучука
3. Легких металлов
4. Чугуна
Выберите верный ответ
Ценным предложением А.Н. Туполева было внедрение в самолётостроение:
1. Дерева
Неверно!
Неверно!
2. Каучука
Неверно!
3. Легких металлов
Верно!
4. Чугуна
Неверно!
Верный ответ
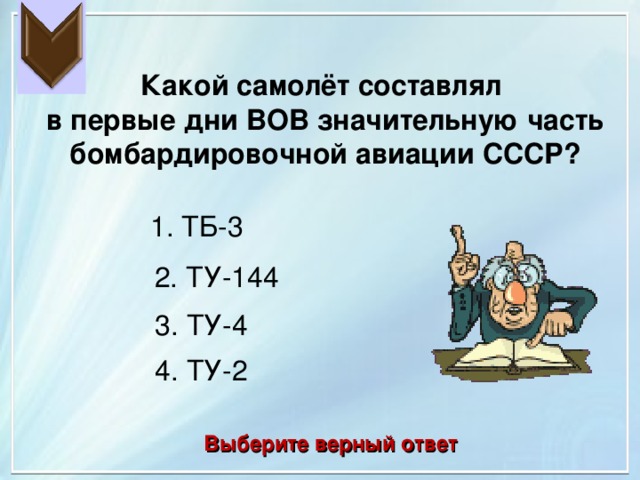
Какой самолёт составлял
в первые дни ВОВ значительную часть бомбардировочной авиации СССР?
1. ТБ-3
2. ТУ-144
3. ТУ-4
4. ТУ-2
Выберите верный ответ
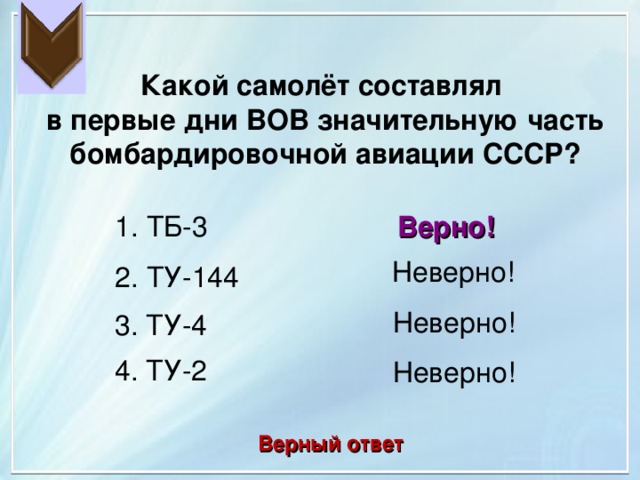
Какой самолёт составлял
в первые дни ВОВ значительную часть бомбардировочной авиации СССР?
1. ТБ-3
Верно!
Неверно!
2. ТУ-144
Неверно!
3. ТУ-4
4. ТУ-2
Неверно!
Верный ответ
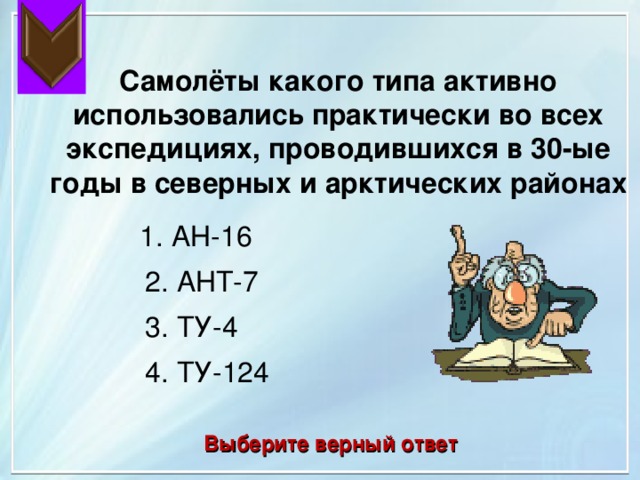
Самолёты какого типа активно использовались практически во всех экспедициях, проводившихся в 30-ые годы в северных и арктических районах
1. АН-16
2. АНТ-7
3. ТУ-4
4. ТУ-124
Выберите верный ответ
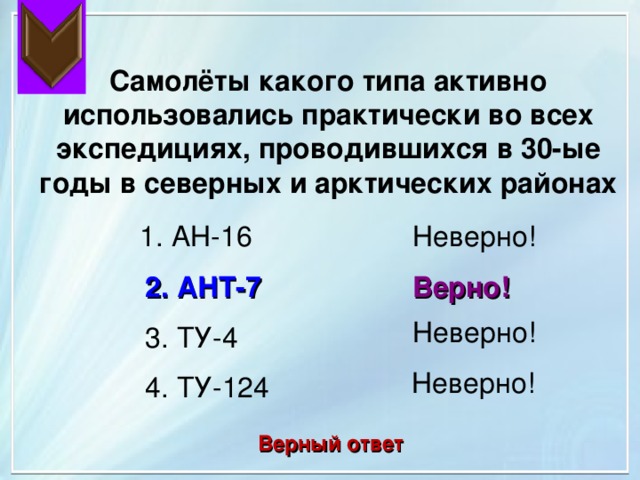
Самолёты какого типа активно использовались практически во всех экспедициях, проводившихся в 30-ые годы в северных и арктических районах
1. АН-16
Неверно!
2. АНТ-7
Верно!
Неверно!
3. ТУ-4
Неверно!
4. ТУ-124
Верный ответ
Самолёт-бомбардировщик, созданный в 1943 году для перевозок атомной бомбы
1. ТУ-4
2. АН-12
3. Пе-8
4. Пе-2
Выберите верный ответ

Самолёт-бомбардировщик, созданный в 1943 году для перевозок атомной бомбы
1. ТУ-4
Верно!
Неверно!
2. АН-12
Неверно!
3. Пе-8
Неверно!
4. Пе-2
Верный ответ
На фото Вы видите первенца отечественного реактивного самолётостроения - самолёт
1. ТУ-16
2. ТУ-104
3. АН-16
4. ТУ-144
Выберите верный ответ
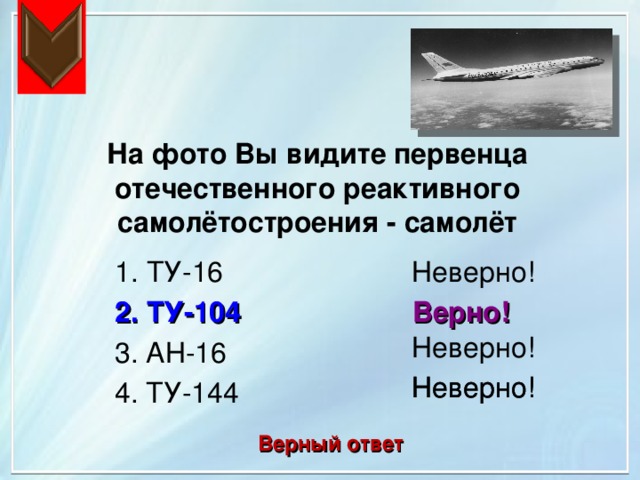
На фото Вы видите первенца отечественного реактивного самолётостроения - самолёт
1. ТУ-16
Неверно!
Верно!
2. ТУ-104
Неверно!
3. АН-16
Неверно!
Неверно!
4. ТУ-144
Верный ответ
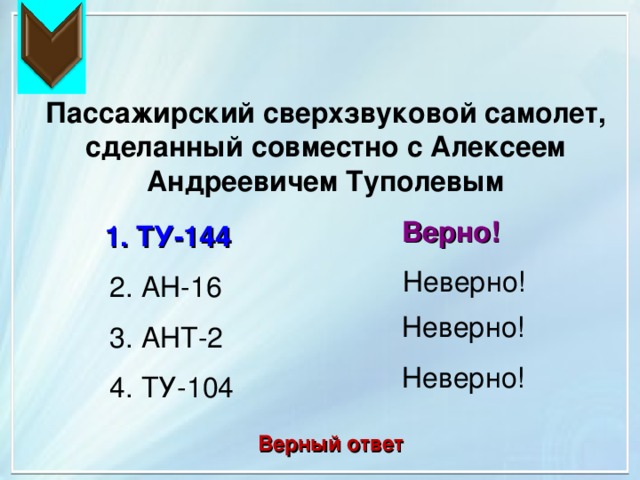
Пассажирский сверхзвуковой самолет, сделанный совместно с Алексеем Андреевичем Туполевым
1. ТУ-144
2. АН-16
3. АНТ-2
4. ТУ-104
Выберите верный ответ
Пассажирский сверхзвуковой самолет, сделанный совместно с Алексеем Андреевичем Туполевым
Верно!
1. ТУ-144
Неверно!
2. АН-16
Неверно!
3. АНТ-2
Неверно!
4. ТУ-104
Верный ответ
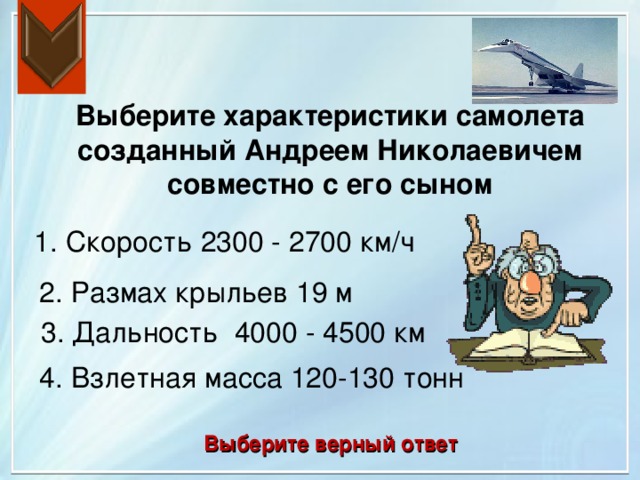
Выберите характеристики самолета созданный Андреем Николаевичем совместно с его сыном
1. Скорость 2300 - 2700 км/ч
2. Размах крыльев 19 м
3. Дальность 4000 - 4500 км
4. Взлетная масса 120-130 тонн
Выберите верный ответ
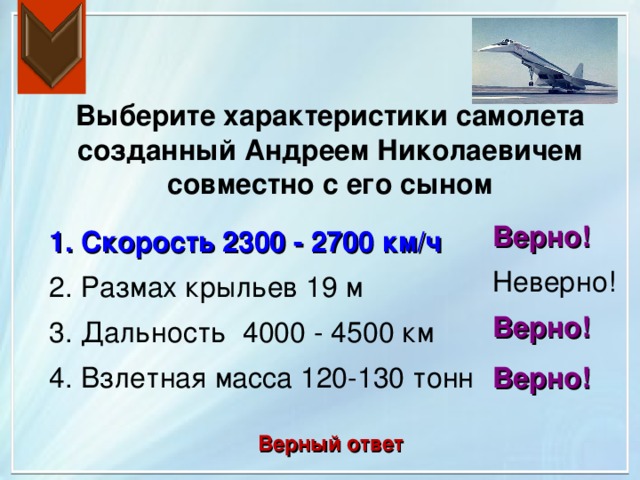
Выберите характеристики самолета созданный Андреем Николаевичем совместно с его сыном
Верно!
1. Скорость 2300 - 2700 км/ч
Неверно!
2. Размах крыльев 19 м
Верно!
3. Дальность 4000 - 4500 км
4. Взлетная масса 120-130 тонн
Верно!
Верный ответ
Источники:
1. http://2mir-istorii.ru/lichnosti-novaya-istoriya/632-tupolev-andrey-nikolaevich.html
2. http://www.personbio.com/view_post.php?id_info=2137
3. https://ru.wikipedia.org/wiki/
4. http://aviacity.eto-ya.com/2012/12/27/tupolev-andrej-nikolaevich-biografiya/
5. http://rus-eng.org/eng/Tupolev%20Andrej%20Nikolaevich.htm
6. http://ria.ru/spravka/20131110/975497582.html
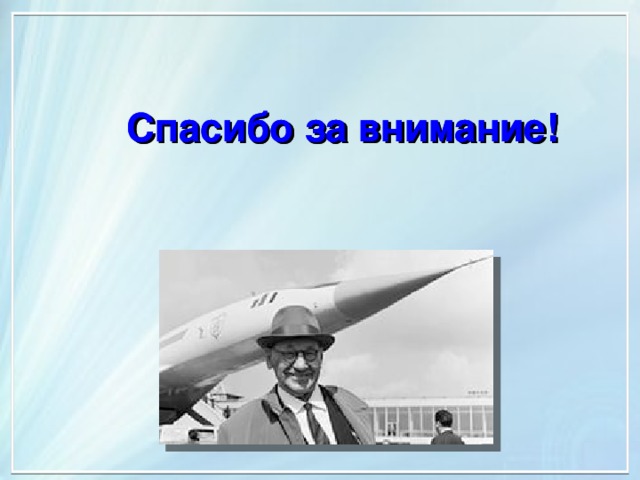
Спасибо за внимание!
Спасибо за внимание!
 Получите свидетельство
 Вход
Вход


 Презентация "Авиаконструктор Туполев Андрей Николаевич" (10.01 MB)
 0
0 3140
3140 492
492 Нравится
0
Нравится
0


